Some times you want to use iSO images without burning them.If you don’t want to waste your CD’s/DVD’s here is the simple possible solutions using these tips you can mount and unmount ISO images without burning them.
I know two possible solutions
1) Using Nautilus Scripts
2) Using kernel loop module
Now we will see each one in detailed
Using Nautilus Scripts
I am taking this tip from here first you need to download two scripts for mount iso images download from here for unmount iso images download from here
Once you have these two scripts you need to chnage the permissions using the following commands
sudo chmod +x /home/username/mount.sh
sudo chmod +x ~/unmount.sh
Now you need to copy them nautilus scripts
sudo mv ~/mount-iso ~/.gnome2/nautilus-scripts/
sudo mv ~/unmount-iso ~/.gnome2/nautilus-scripts/
That’s it now you are ready for mounting and unmounting your ISO images.
Example
Mount ISO Image
Now i have one ISO image if you want to mount you need to right click and select scripts —> mount-iso

Now it will prompt for root password and click ok

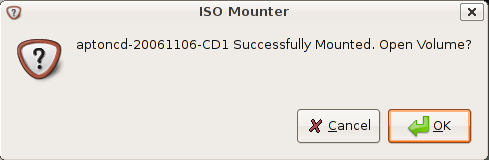
You can see the Mounter notification like the following

Here is the Successfully mounted message if you want to open this one click ok
This shows you available contents in mounted ISO image

Unmount ISO Image
Now i have one ISO image if you want to mount you need to right click and select scripts—>unmount-iso

Here is the Successfully Unmounted message

Using loop Kernel Module
First you need to make the directory to put the ISO into using the following command
sudo mkdir /media/isoimage
Now you need to add the loop module to your kernel.
What kernel loop module does?
I want to give brief introduction to kernel loop module.Using the module loop it is possible to mount a filesystem file. squashfs is a “loop” with (de)compression (Compressed Loopback Device) and it is possible to mount a compressed filesystem like a block device and seamlessly decompress its data while accessing it.
Use the following command to load loop module
sudo modprobe loop
Mount ISO Image
If you want to mount you need to use the following command
sudo mount debianetch.iso /media/isoimage/ -t iso9660 -o loop
In the above command you can replace debianetch.iso to your own iso image.
Now you should have your iso file mounted, and accessible from your desktop.
Unmount ISO Image
Unmount ISO Image Using the following command
sudo umount /media/isoimage
What about bin and cue files? How do you mount/unmount those?
I am not sure how to mount .bin/.cue file and i can give you one more work around for .bin/.cue files use bchunk.
binchunker converts a CD image in a “.bin / .cue” format (sometimes “.raw / .cue”) to a set of .iso and .cdr tracks. The bin/cue format is used by some popular non-Unix cd-writing software, but is not supported on most other CD burning programs. A lot of CD/VCD images distributed on the Internet are in BIN/CUE format
install bchunk using the following command
sudo apt-get install bchunk
The syntax from bchunk is as follows
bchunk [-v] [-p] [-r] [-w] [-s]
So if i wanted to convert image,bin and image.cue into image.iso, I’d run the command
bchunk image.bin image.cue image.iso
hope this helps
Thanks!
It’s
bchunk foo.bin foo.cue foo
thanks!!! linux no0b here…
I’ve been all around the internet for this. I’m using Ubuntu Edgy Eft and it works! I just got it working though and I haven’t done any tests.
…now I can play Grim Fandango again…hehehe
Any idea what may cause this not to work? I followed your directions EXCEPT instead of issuing mv ~/mount-iso, I isssued ~/mount.sh since mount-iso was not recognized. The only error message I got was that the system was unable to mount “xxx.iso”.
I’m trying to mount an ERP 5 ISO image.
Thank you. I hope you are well.
I’m just a newbie in linux and I’d like to try this step to run ubuntu 11.10 on my compie before I can upgrade from ubuntu 11.04 that I’m using now.
I have install ubuntu 11.10 in another hard disc,but I can’t connect to Internet with wvdial,any suggest for me?thanks.
This mount script not working in Debian 7
You cannot mount image with path because the ‘/’ slash signs is removed by the mount command.
you need somehow to double slash //
or to tell the bash or the mount to parse slash correctly
or make a ChDir to the .ISO image directory