Dar is a shell command that makes backup of a directory tree and files. Its features include splitting archives over several files, CDs, ZIPs, or floppies, compression, full or differential backups, strong encryption, proper saving and restoration of hard links and extended attributes, remote backup using pipes and external command (such as ssh), and rearrangement of the “slices” of an existing archive. It can now run commands between slices, encrypt archives, and quickly retrieve individual files from differential and full backups. Dar also has external GUI like kdar for Linux,thanks to the well documented API.
Kdar is GUI for dar.KDar is the “KDE Disk archiver”, a disk-based archiving and backup utility.KDar is built around the “disk archive library” by Denis Corbin, and is similar in function to his “DAR” program. DAR is somewhat analogous to the “tape archiver” shell command “tar”, but is better suited for backups onto disk-based media, such as CD-R’s, DVDs,Jazz, Zip, other hard-drives, etc.
KDar can perform differential backups, which means that it can quickly store the differences between a recent full backup and the current state of your data.KDar now supports strong encryption based on the blowfish algorithm.
Install dar and kdar in Ubuntu
For dapper Users
sudo apt-get install dar kdar
For Edgy Users
sudo apt-get install dar kdar
kdar Edgy Problem with Solution
When you try to install kdar you will get the following error
The following packages have unmet dependencies.
kdar: Depends: libdar3c2a but it is not installable E: Broken packages
Solution1
If you are seeing the above error you need to download libdar3c2a from dapper packages and install this package.
Solution2
You can also use the following procedure when you do this you need to be very careful what you are doing.
you can edit the /etc/apt/sources.list file
sudo vi /etc/apt/sources.list
add the following line
deb http://gb.archive.ubuntu.com/ubuntu/ dapper universe
save and exit the file.
Now update the souce list using the following command
sudo apt-get update
Install libdar3c2a from dapper packages using the following command
sudo apt-get install libdar3c2a
Once this finished the installation you need to remove the line we have added in /etc/apt/sources.list for dapper save the file and exit
Now you need to update the source list using the following command
sudo apt-get update
This will complete the installation now if you want to open the application go to Applications—>Accessories—>KDar
(Disk-Based Archive Tool)

Once it opens you should see the following screen here select basic setup and click on next

Here if you want to use KDE Wallet to store your password enable this otherwise click on finish

Now you need to define where you want to archive directory and click ok

If that directory you choose doesn’t exist it will create for you select yes

Dar is Loading

Once it opens the complete application you should see the following screen this is kdar main screen.Below the titlebar are KDar’s Menubar and Toolbar. The Menubar allows you to open and create archives, operate on them, and get information about KDar. The Toolbar gives you one-click access to many of KDar’s features, and you can configure it to your liking by right-clicking on it.

Creating archives Using KDar
To create an archive, select “Archive->Create” (at bottom of menu).

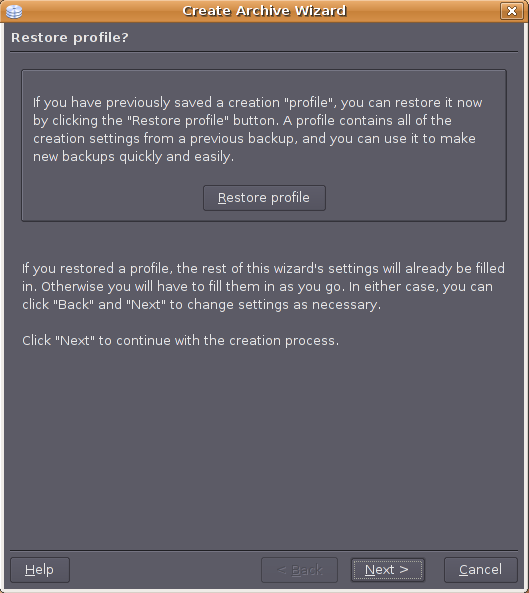
Let the wizard take you step-by-step through the archiving process. Use the Next > and < Back buttons at the bottom of the wizard to navigate the pages. The rest of this section describes this procedure in detail, and you can skip it if you just want to create a basic archive. The first page of the create wizard gives you an opportunity to restore a “profile”. Profiles store all of the information needed to perform one of KDar's operations. You save them to your filesystem as regular files, with any name you like, ending with “.kdar”. Currently KDar supports “creation” and “restoration” profiles. To load a creation profile, click the Restore profile button and select the profile. You probably haven't saved a profile yet, so just click the Next > button.
Now you need to enter the archive name and you can choose your choice of name but recommended one is descriptive you can see this in the following screen

The “root directory” is the filesystem’s top-level directory that you want to archive. KDar will consider all directories and files below this directory for inclusion in the archive, but no files above or adjacent to this directory.Here Choose the archive’s root directory.

Creating full system backups can take several hours on modern filesystems. KDar can optionally store the difference between the current state of the filesystem and the state of the filesystem when you last created a full backup. The
new archive is called a “differential” archive. Performing a differential backup can take considerably less time than doing a full backup, and the resulting archive usually takes up much less space on your filesystem or storage media.
If you want to make a differential backup, enable the differential backup checkbox, and select the reference archive.
The reference archive can be from a previous full backup, a previous differential backup, or an archive catalog. Archive catalogs contain only the basic archive information, such as the contents, but are equivalent to regular archives as far as differential creation is concerned.
Leave the checkbox unchecked if you’re making a new archive (e.g., a full backup).

KDar has many advanced creation features which you can configure by clicking the Configure creation options button.You can see the advanced configuration options screen as follows.This brings up a configuration dialog which allows you to customize the creation process to suit your needs. For example, KDar has powerful directory and file filtering mechanisms which allow you to fine-tune which directories and files to include in the archive. You can also choose whether to compress the archive contents, and you can specify which types of file to exclude from the compression process. KDar now supports strong encryption, and you can enable it there.If you want to use advanced options Configure the advanced creation settings.

Now you can save your settings as a profile.When you’re satisfied that everything is okay, click Finish.

Your archive should be created. KDar will show you a progress dialog which displays the percentage of files processed,the media type and current archive slice size. Filenames are also displayed as they are added to the archive.

Restoring archives Using KDar
Select “Archive->Restore”

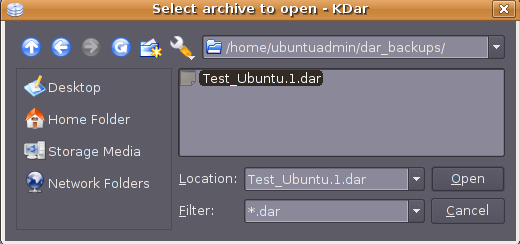
You should see the following screen

Here you need to select the archive you want to open select .1.dar and click on open
Now you need to choose a directory to extract your archive into and click on folder icon to choose a directory

You should see similar to the following screen select a directory to extract your archive and click ok

Once you selected restore directory you should see the following screen and click ok

It will start the restore process you can see this in the following screen

This will restore all the files you have selected for restore.This is very simple and useful backup tool for all ubuntu users and admin.
If you want more documentation about kdar check here and if you want to use dar from command line check dar documentation here